Docs
Doc / Cases / VNC
Display and Control macOS, Linux and Windows with OmniEdge
Virtual Network Computing (VNC) is a graphical desktop-sharing system that uses the Remote Frame Buffer protocol (RFB) to remotely control another computer. It transmits the keyboard and mouse input from one computer to another, relaying the graphical-screen updates over a network.
With OmniEdge, VNC can work securely over OmniEdge's peer-to-peer mesh network, replacing expensive remote access tools with a secure, encrypted connection from anywhere.
Features
- Remote Control across Windows, Mac, Linux
- Cross-platform support
- File transfer
- Secure encryption via OmniEdge mesh
- No port forwarding required
Requirements
Install OmniEdge
Quick Install (Linux/macOS CLI)
curl -fsSL https://raw.githubusercontent.com/omniedgeio/omniedge/main/scripts/omniedge-install.sh | bashConnect to Your Network
# Start OmniEdge (interactive login on first run)
sudo omniedge start

# Or use security key for headless/server use
sudo omniedge start -s YOUR_SECURITY_KEY -n YOUR_NETWORK_ID
Verify Connection
omniedge status
# Shows your virtual IP, e.g., 100.100.100.5
Install TightVNC for Windows
Download TightVNC and install it. TightVNC runs on any version of Windows.
Refer to the TightVNC Installation Guide (PDF) for detailed setup.
Install TightVNC
- Windows 64-bit: tightvnc-2.8.27-gpl-setup-64bit.msi
- Windows 32-bit: tightvnc-2.8.27-gpl-setup-32bit.msi
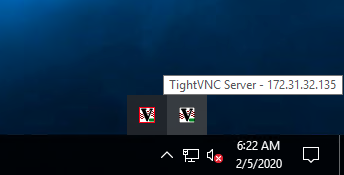
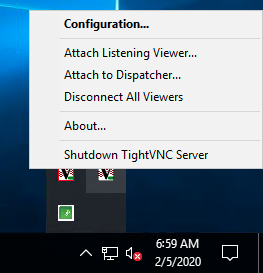
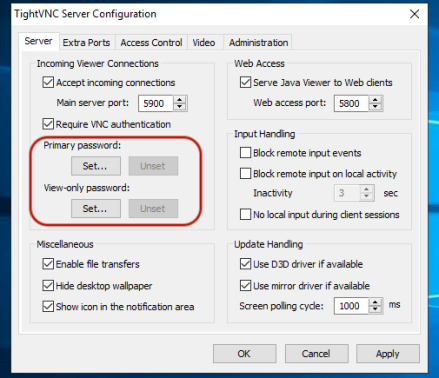
Configure TightVNC Server
After running TightVNC Server, you'll see a tray icon:
Right-click the tray icon to access Configuration:
Set the password for remote control:
Install TightVNC for Ubuntu
sudo apt update
# Install desktop environment if needed
sudo apt install xfce4 xfce4-goodies -y
sudo apt install tightvncserver -y
Run the vncserver command to set a VNC access password and start a VNC server:
vncserverThe server launches on port TCP 5901 (display :1). VNC can launch multiple instances on other display ports (:2 = 5902, :3 = 5903, etc.).
Stop the server with:
vncserver -kill :1Run VNC Server as a Service
sudo tee /etc/systemd/system/vncserver@.service << 'EOF'
[Unit]
Description=Start TightVNC server at startup
After=syslog.target network.target

[Service]
Type=forking
User=ubuntu
Group=ubuntu
WorkingDirectory=/home/ubuntu

PIDFile=/home/ubuntu/.vnc/%H:%i.pid
ExecStartPre=-/usr/bin/vncserver -kill :%i > /dev/null 2>&1
ExecStart=/usr/bin/vncserver -depth 24 -geometry 1280x800 -localhost :%i
ExecStop=/usr/bin/vncserver -kill :%i

[Install]
WantedBy=multi-user.target
EOF

sudo systemctl daemon-reload
sudo systemctl enable vncserver@1.service
sudo systemctl start vncserver@1
sudo systemctl status vncserver@1
VNC port: 5901 for :1, 5902 for :2, etc.
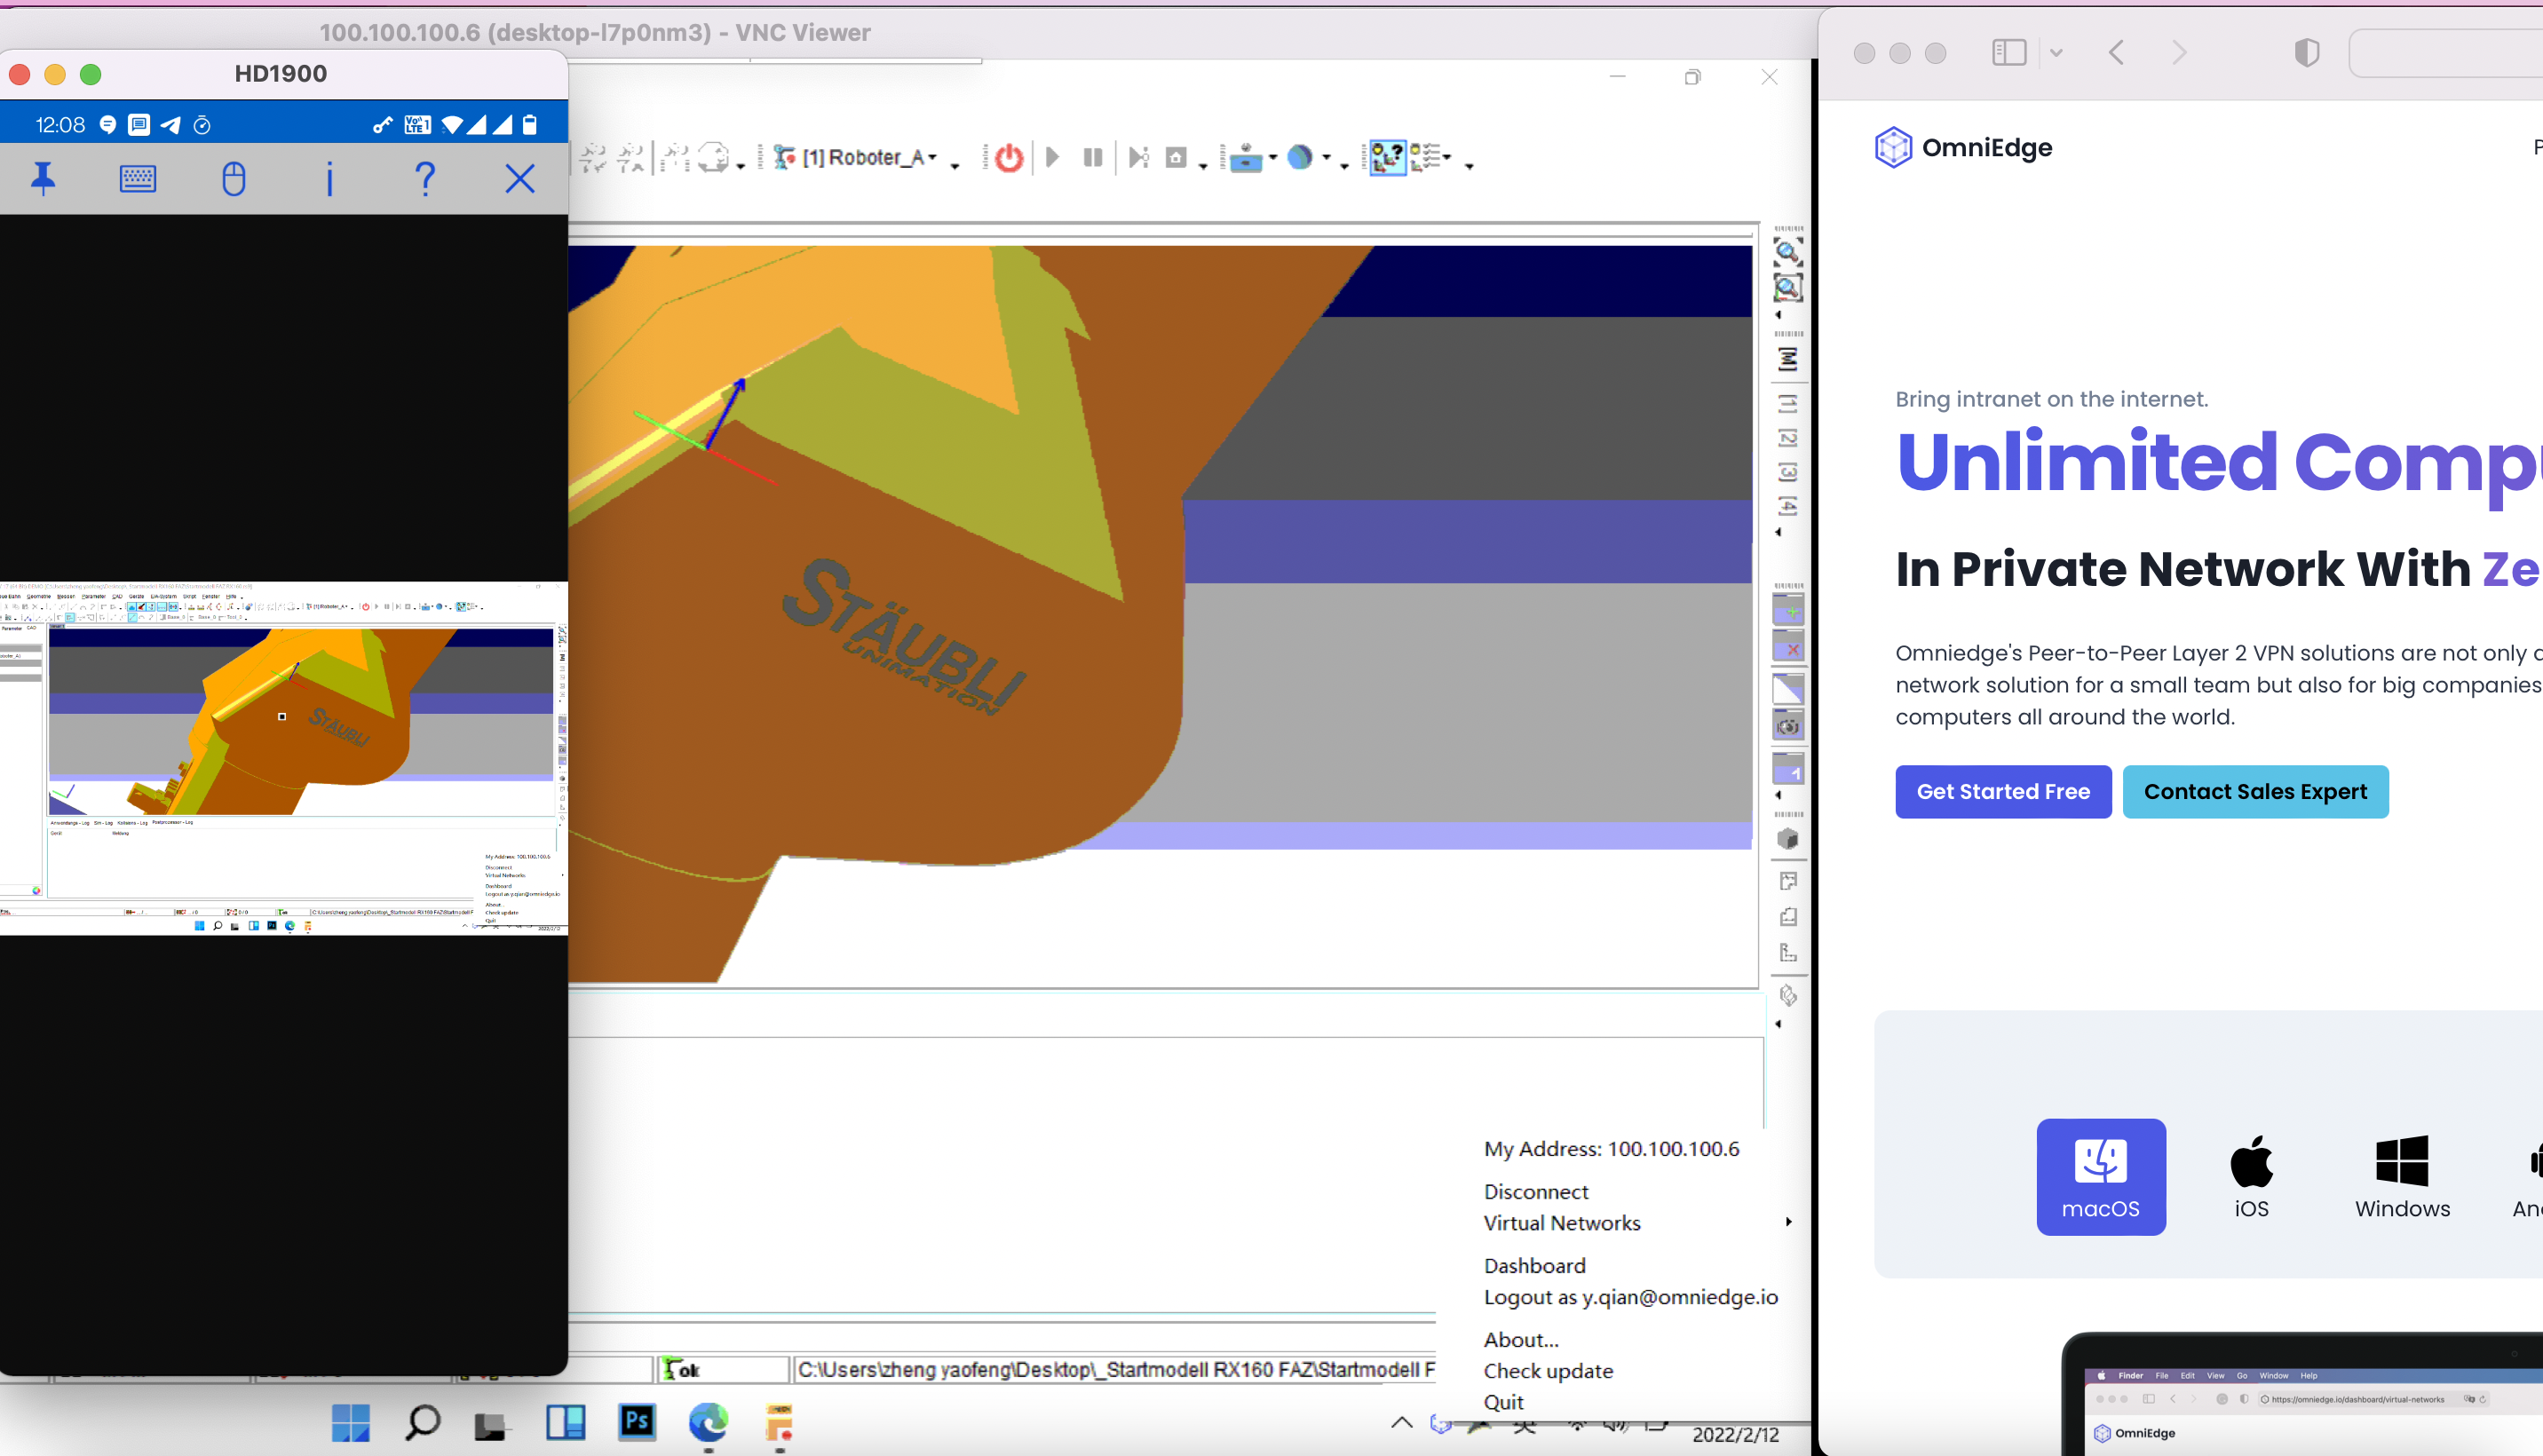
Connect via OmniEdge
Once both machines are connected to the same OmniEdge virtual network:
- Note the VNC server's virtual IP (e.g.,
100.100.100.10) - On your VNC client machine, connect using the virtual IP:
VNC Server Address: 100.100.100.10:5901Or for TightVNC Viewer on Windows:
Remote Host: 100.100.100.10::5901Remote Control a Friend's Computer
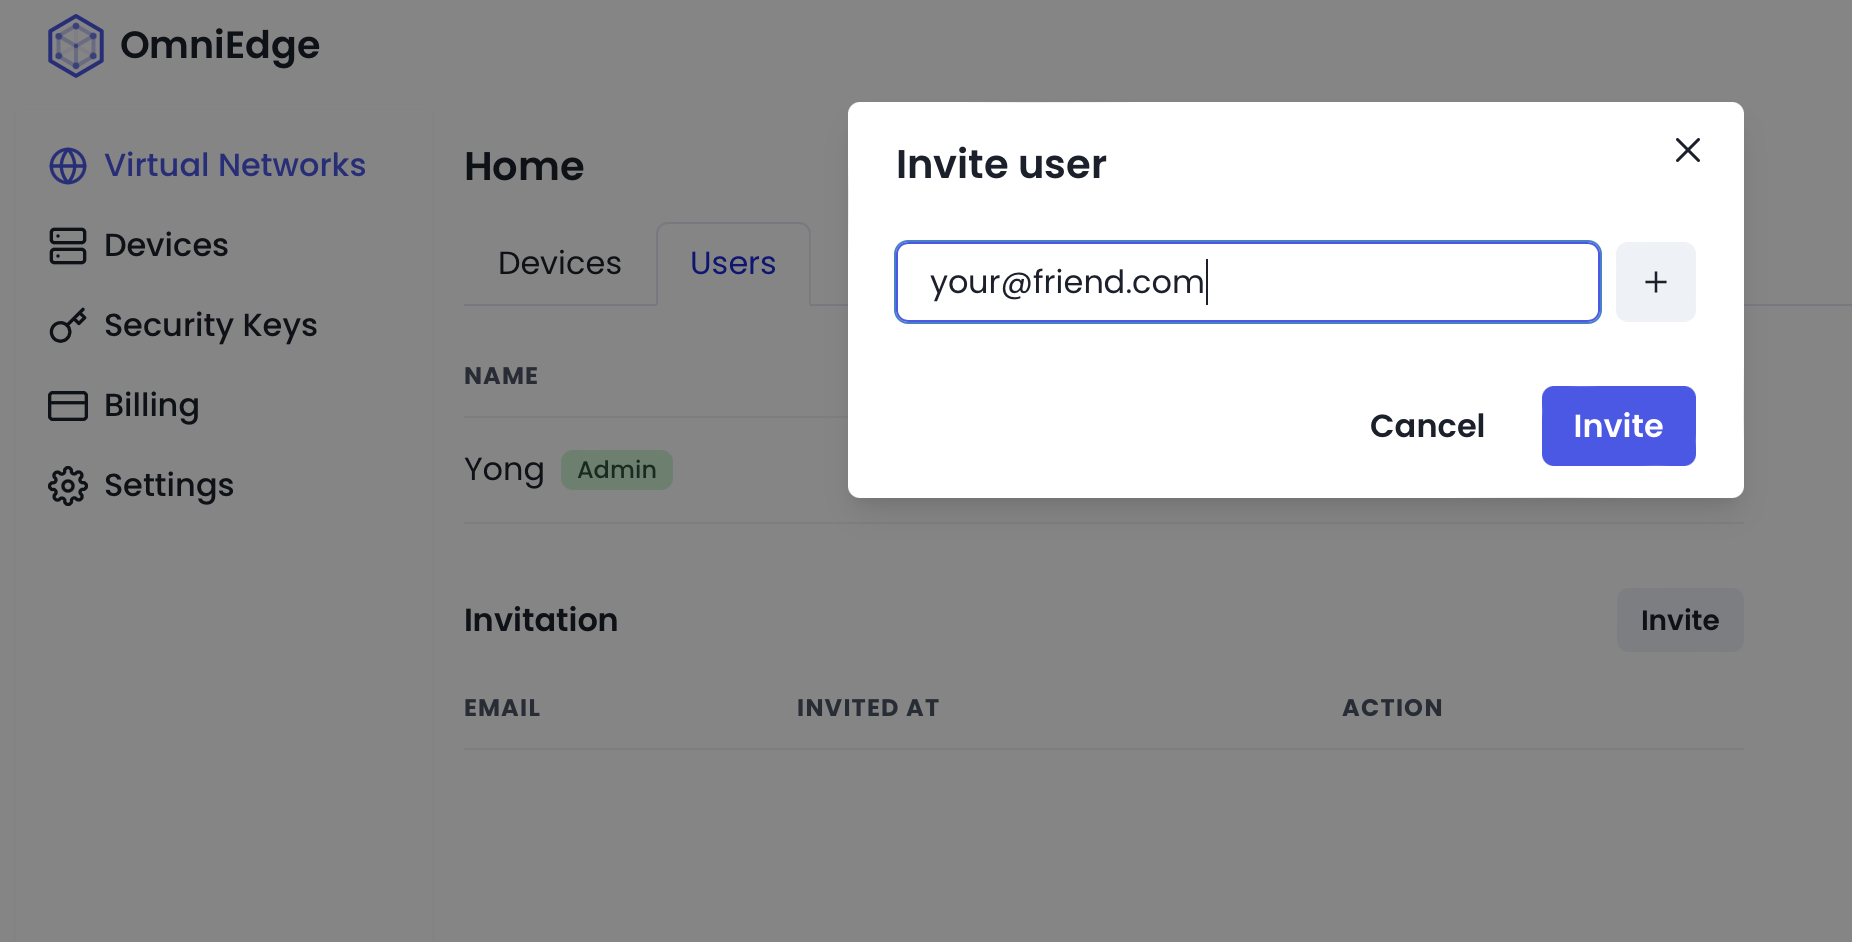
You can invite friends to your virtual network to provide remote support:
- Go to OmniEdge Dashboard
- Select your virtual network
- Go to Users → Invite
- Enter your friend's email address
Once they accept and install OmniEdge, you can connect to their VNC server using their virtual IP.
Security Benefits
Using OmniEdge with VNC provides:
- No exposed public IP - VNC server is only accessible via virtual IP
- End-to-end encryption - All traffic encrypted with WireGuard
- NAT traversal - Works through firewalls and NAT without port forwarding
- Access control - Only invited users can join your network
If you have more questions, feel free to discuss.
On This Page