Docs
Doc / Cases
Remote Connect Windows Without Exposing Public IP with OmniEdge
AWS, Azure, and other cloud providers offer RDP (Windows Remote Desktop Protocol) to remotely connect to Windows Server instances. However, RDP has security concerns:
- Exposed public IP - Anyone who knows the IP can attempt to connect
- Single connection - Only one remote connection at a time
- Legacy protocol - Developed in 1998 for Windows NT Server 4.0
Traditional security measures require significant effort: enabling NLA, eliminating network access, system patching, strict policies, MFA, etc.
OmniEdge provides a simpler solution - Keep RDP connections within a private mesh network, eliminating public IP exposure.
How It Works
- Connect your cloud instance to OmniEdge virtual network
- Restrict RDP access to only virtual network IPs
- Connect via virtual IP from any device in your network
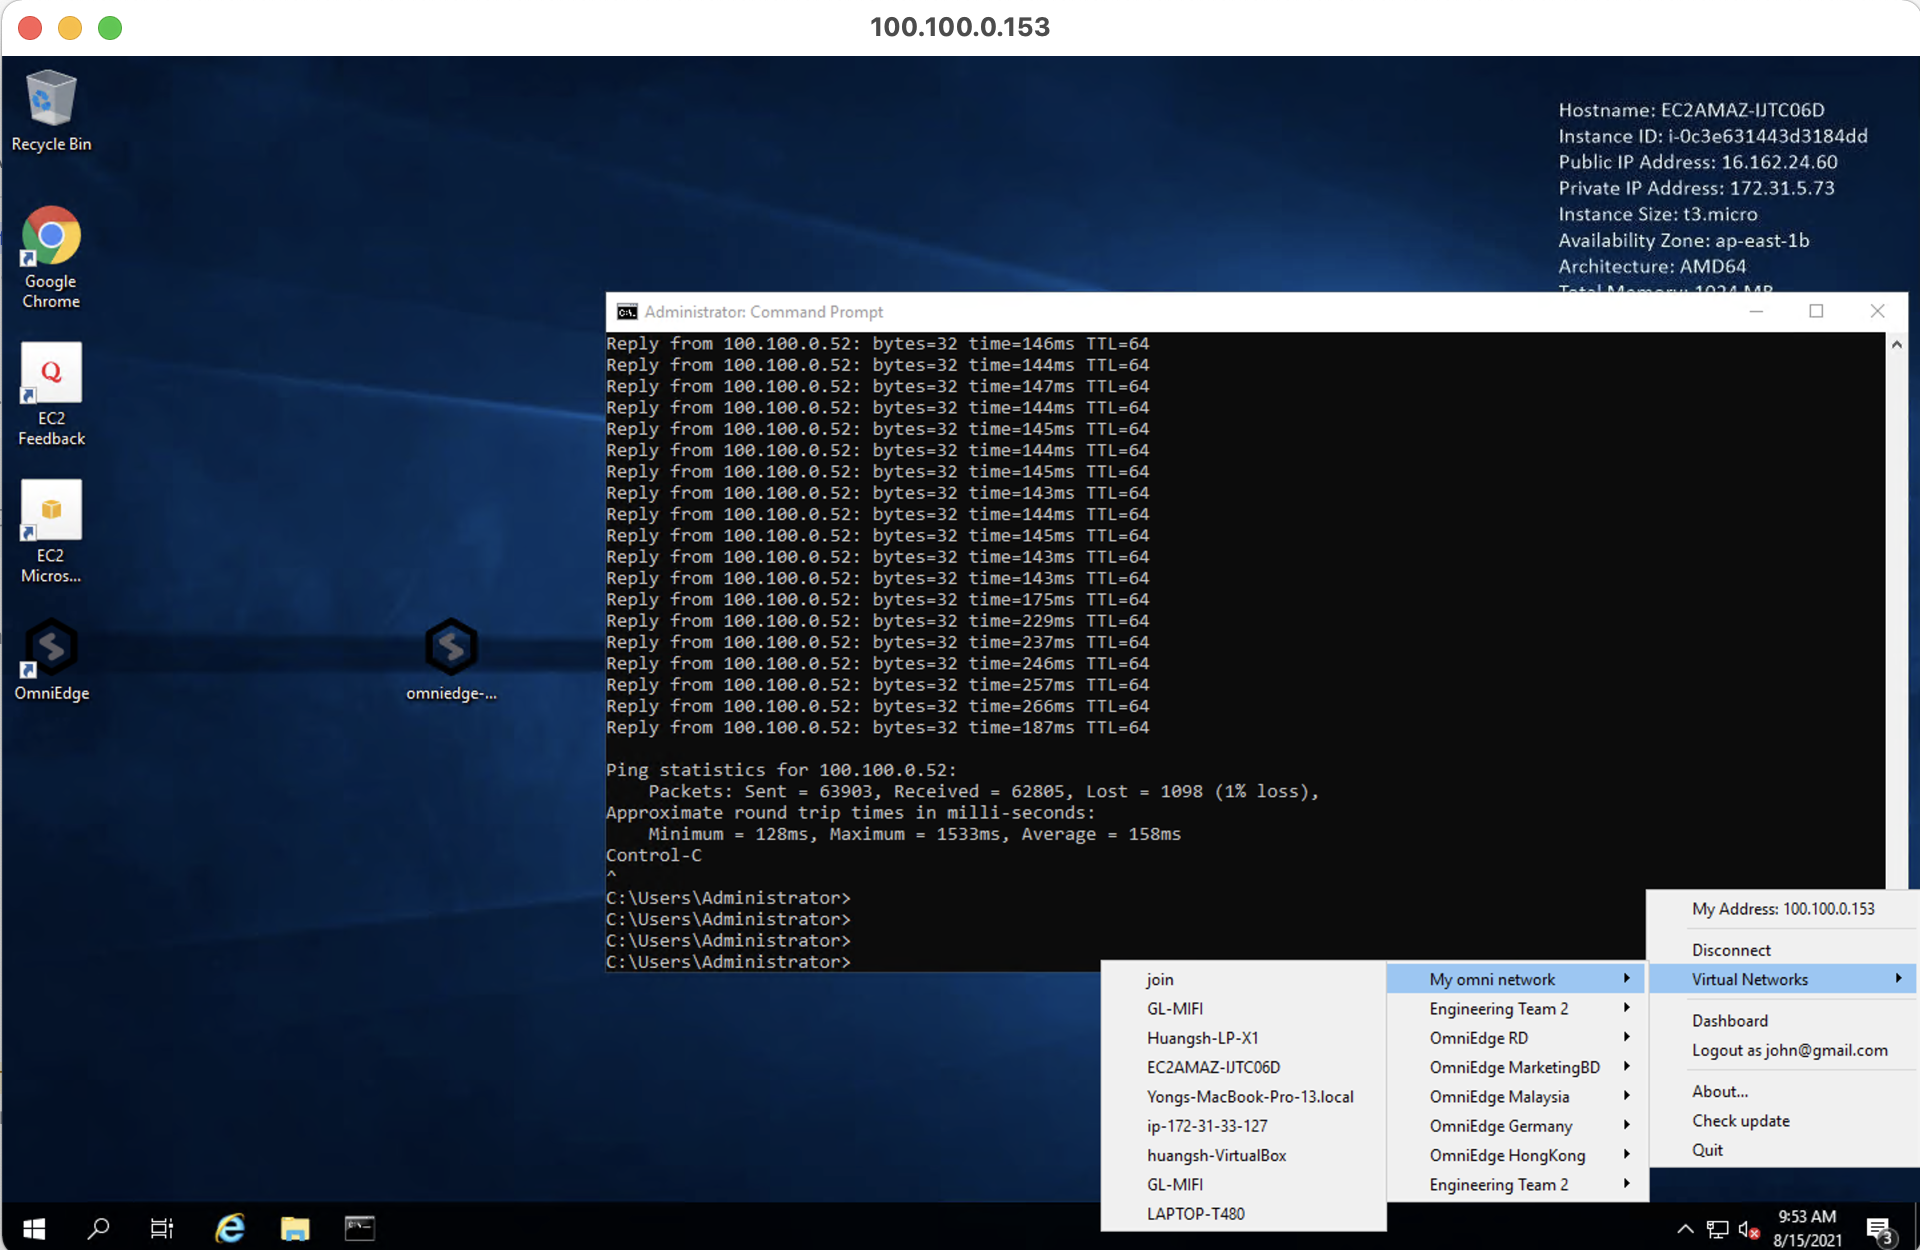
Step 1: Install OmniEdge on Windows EC2
Connect to your Windows EC2 via public IP (one last time), then install OmniEdge:
Option A: Desktop App (Recommended)
Download OmniEdge Desktop for Windows and install it. Sign in and connect to your virtual network.
Option B: CLI
# Download and extract CLI
Invoke-WebRequest -Uri "https://github.com/omniedgeio/omniedge/releases/latest/download/omniedge-cli-v2.2.1-windows-x86_64.zip" -OutFile omniedge.zip
Expand-Archive -Path omniedge.zip -DestinationPath C:\omniedge

# Add to PATH and connect
$env:Path += ";C:\omniedge"
omniedge start -s YOUR_SECURITY_KEY -n YOUR_NETWORK_ID
After connecting, note your virtual IP (e.g., 100.100.100.153).
Step 2: Update Security Groups
Log into your AWS EC2 Console:
- Select your Windows EC2 instance
- Go to Security → Security Groups
- Click Edit Inbound Rules
- Change RDP source from
0.0.0.0/0to your virtual network CIDR (e.g.,100.100.100.0/24)
Before: 0.0.0.0/0     - Anyone can attempt connection
After:  100.100.100.0/24 - Only OmniEdge network members can connect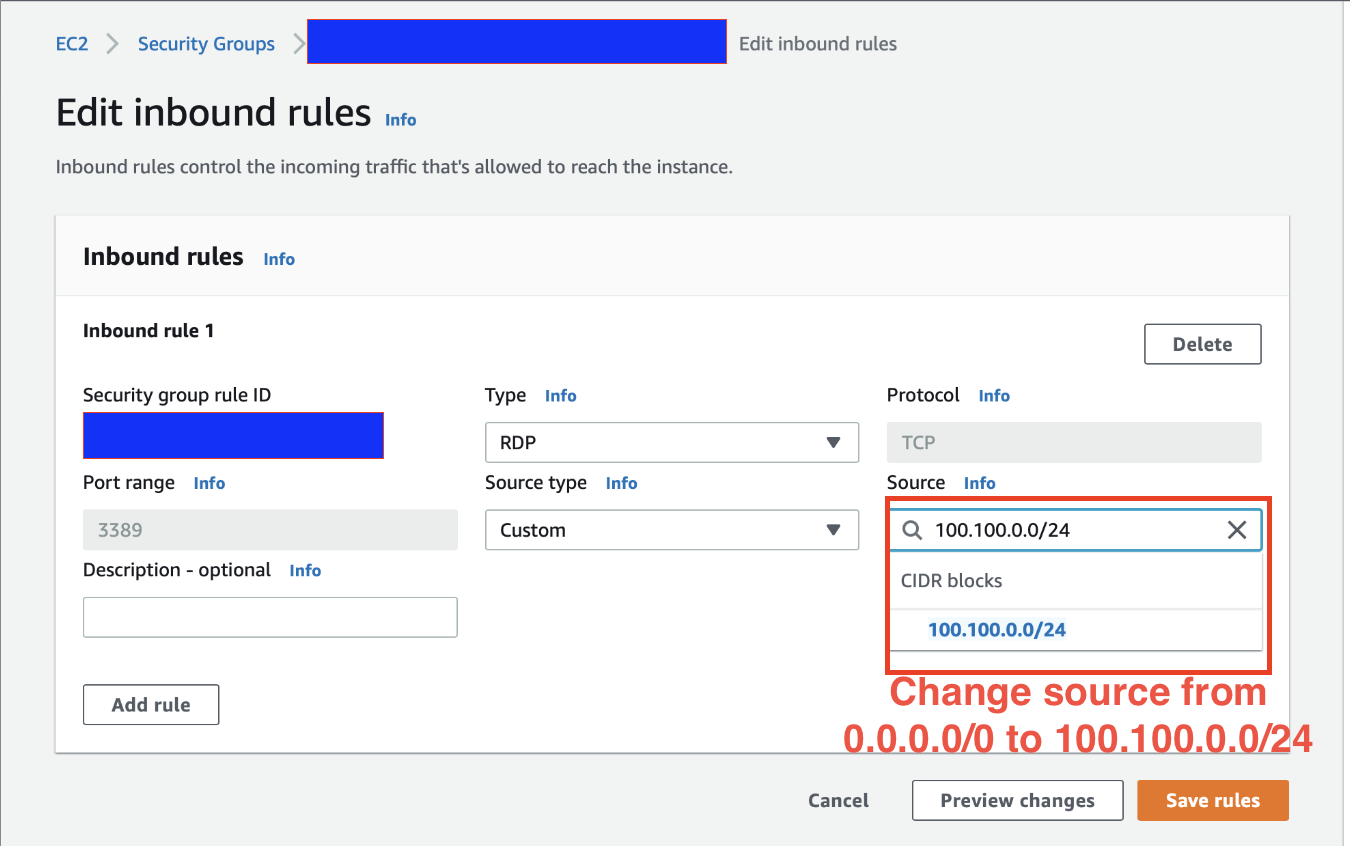
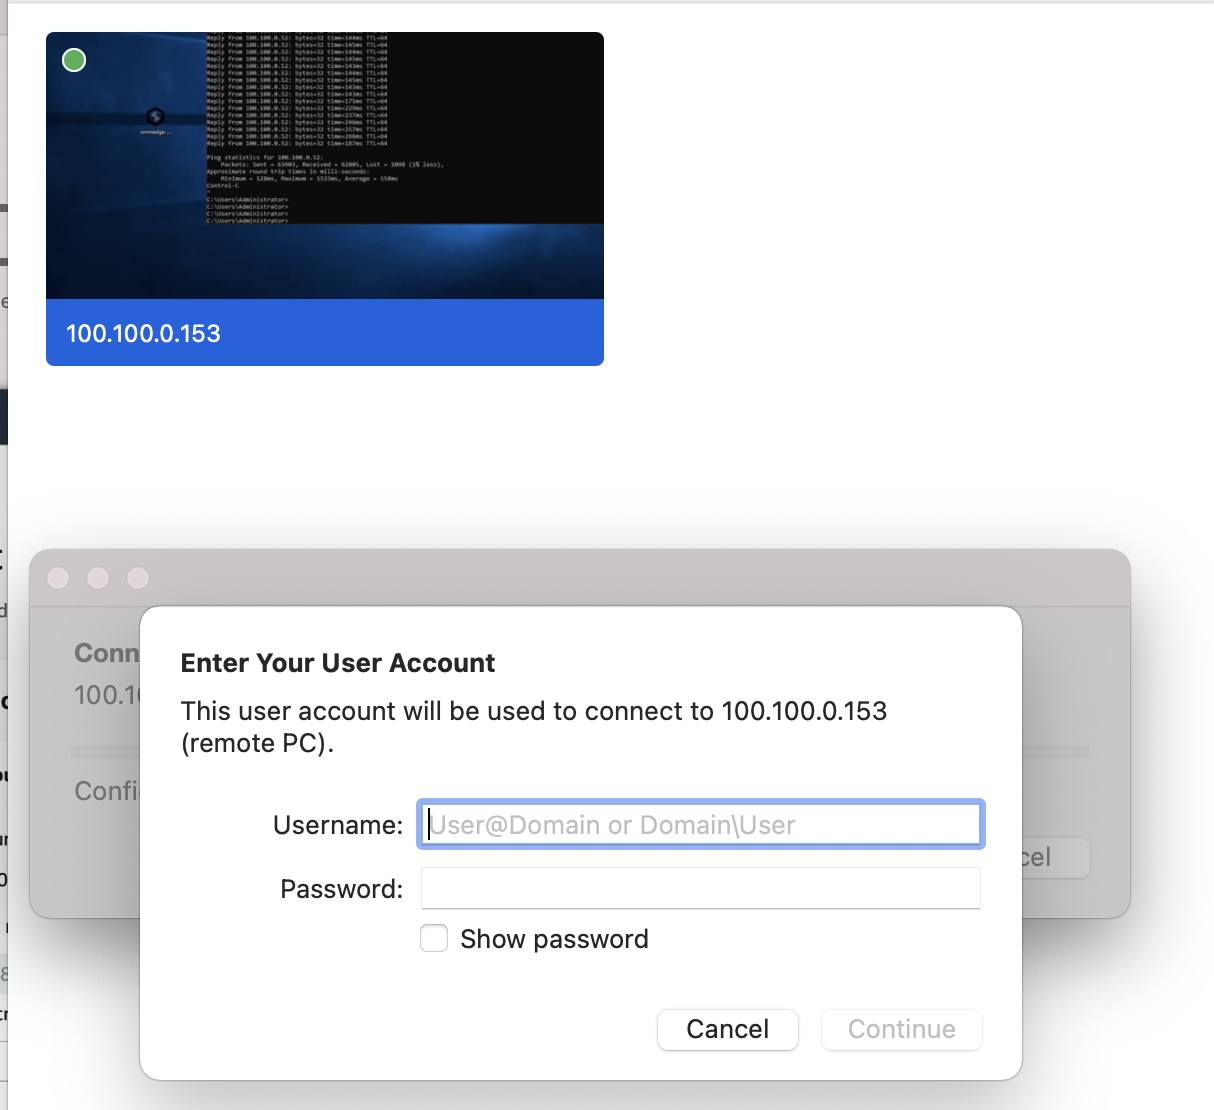
Step 3: Connect via Virtual IP
On your local machine (also connected to OmniEdge):
Using Remote Desktop
- Open Remote Desktop Connection
- Enter the virtual IP:
100.100.100.153 - Connect with your Windows credentials
Using VNC (Alternative)
For VNC access with file transfer capabilities, we recommend TightVNC. See TightVNC documentation for setup.
Run OmniEdge as Windows Service
For production servers, run OmniEdge as a Windows service to ensure it starts on boot:
# Using NSSM (Non-Sucking Service Manager)
# Download from https://nssm.cc/

nssm install OmniEdge "C:\omniedge\omniedge.exe" "start -s YOUR_SECURITY_KEY -n YOUR_NETWORK_ID"
nssm set OmniEdge Start SERVICE_AUTO_START
nssm start OmniEdge
Security Benefits
| Without OmniEdge | With OmniEdge |
|---|---|
| Public IP exposed on internet | Only virtual IP accessible |
| Vulnerable to brute force attacks | Network-level access control |
| Requires complex firewall rules | Simple CIDR-based security groups |
| Port 3389 open to world | Port 3389 restricted to virtual network |
Azure Virtual Machines
The same approach works for Azure VMs:
- Install OmniEdge on the Azure VM
- Update Network Security Group (NSG) rules
- Change RDP source IP to your OmniEdge network CIDR
Enjoy secure remote access!
If you have more questions, feel free to discuss.
On This Page